Centuries ago, people don’t have same electric appliances that make our lives easier today. Everything that they do, they do manually, and still produced some of the best products that the world has ever seen. So, ask yourself, why couldn’t you do that too?
We’re sure that none of our grandmas ever had electric mixers, but most of their baking recipes are bombs. That just proves that you don’t need a good mixer to achieve that recipe, just prepare a lot of patience and determination. You can accomplish all of those food goals by hand.

One of the trickiest things that you’ll ever have to do is to cream butter and sugar together. Sure, it seems simple enough, throw eggs and butter in a pot and start beating them until the resulting mixture looks good enough. Does that seem right? Nah, we don’t think so either.
There’s a reason why there are plenty of online tutorials on how to do this task, and that’s because it’s so easy to get it wrong. You have to understand that this cream and sugar mixture will serve as a foundation for your dish. Get it right, and you’ll have a masterpiece in your hand. Get it wrong, and you’d have spent the past hour or so on a dish you can barely eat yourself.
So, how do you cream butter and sugar? If you’re at a loss on how to start, you’ve come to the right place. We can teach you everything about how to get this process right. We’ll get you through all of it without even using a mixer.
That’s right, we’re doing this manually. We’ll teach you the proper steps on how to cream butter and sugar by hand. So, without further ado, let’s start creaming.
4 Steps of Creaming Butter and Sugar by Hand
All right ladies (and some gentlemen, probably), ready your whisks, because we are about to start. Pay attention to the next steps and follow them carefully as every little mistake can make a lot of difference. When you’re ready, let’s begin!
1. Gather Your Ingredients

The first important step in every cooking session is to complete the ingredients in your recipe. Try to get the best brands and the highest quality items. They’ll do a lot to improve taste of your dish.
Butter
Don’t think that the most expensive butter in a supermarket will be the best. There are two kinds of butter, and they’re both readily available everywhere. So, when you’re shopping for this ingredient, make sure to pick up the right one.
There are unsalted and salted types of fat butter; in cooking, people can use both — it really depends on your taste. Of course, the unsalted is the one that’s mostly used in dishes and recipes everywhere. However, if you’re going for an unusually salty flavor, consider getting the other one too.
When creaming butter, the type you use wouldn’t make that much of a difference. However, its taste will change; its texture and fluffiness would stay the same.
Sugar
You’re probably aware that there are many types of sugar. While we commonly just pick up the white one, there’s so much more that we have to know about this common cooking ingredient. So, put that pack of sugar down and listen first.
If you’re going for supermarket sugar, at least go for those brown ones — they’re sweeter because they underwent less processing than their whiter counterparts. Remember that all these ingredients are essential to make your cream, and sugar is one of the major ones. So, choose wisely.
We do suggest hunting a pack of granulated sugar. Some supermarkets have them, and in any case, they’re available online. These are what professional bakers use in cooking contests and large restaurants.
Big Bowl
It might not seem as necessary, but try to find a glass bowl to do the creaming. Sure, you have plastics at home, but it’s much harder to do whisking and beating on it. Plus, they could contaminate your food, since it’s so easy to destroy, and your whisk could dent them.
Whisk or Spoon
A large spoon would do, but if you have it, use a whisk or even a combination of both. A whisk is great for doing mixing of cream, and sugar is easier to blend in with a spoon. Still, whatever works, works, so you’re always free to do your own thing.
2. Soften Your Butter

So, how do you cream butter? You can use a mixer too, but, in this tutorial, we’ll cream butter by hand. Take your bowl and ready your whisk. Before everything cut your butter into smaller pieces, that’ll make it easier to melt.
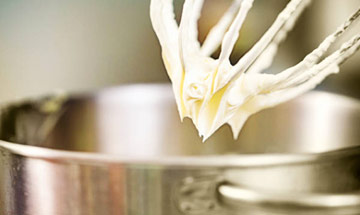
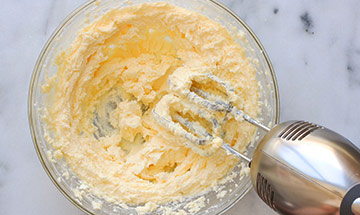
What is cream? It’s a mixture that you’re hoping to turn that butter into. Throw in your little cubes of butter and cream them until they start getting a little fluffy. That means, mix them using your whisk and don’t stop until it looks like an actual cream.
That’s the only way on how to whip butter properly. At least by using your hand, you can control the number of bubbles that mixture has. We don’t want to end up with a cream that’s too light fluffy. That won’t taste right, and it will make your bread (let’s say, you’re baking), blow up inside your oven.
The perfect mixture would look somewhat like peanut butter. It should feel thick but also manageable. It shouldn’t be too light but not too yellow, and it should have too many bubbles on it.
Should the butter’s temperature matter? Of course, it should. Many moms (ours included) suggested just to use normal temperature. This means room temperature when your butter’s just sitting in the room for quite some time.
That works, but it’s not the best temperature to use. Ideally, keep your shortening in a place with 65-70 degrees Fahrenheit. That might seem a little warm, and you’ll notice your butter melting a little but trust us, it’ll do your dish wonders.
That’s it! You’re done with the longest step in this tutorial. Remember that this is just the part where you learn how to cream butter and sugar should be nowhere near that mixture yet.
3. Blend the Butter and Sugar Together

Now that you know how to cream butter. It’s time to combine sugar and cream. This is a very important step since it will decide what ultimately becomes of your dish. Will it be the star of the table, or will you be forced to slide it down the trash?
So, start pouring sugar into that bowl. If you don’t know how much you’d want it to have, just dip your hand in and taste it. Don’t worry, it’s not bad for you or anything. Just keep tasting and adding until you get your desired taste, but remember, it’s going to lose a little sweetness inside the oven or in the pan, so go over a little to make sure.
4. Scramble!
Now that your bowl is complete, it’s time to start it all up. Just take your whisk and fork and mix that bowl into perfection. It’ll start to hurt your hand after some time, and you can actually take a short rest, but you shouldn’t stop. Otherwise, your cream will start looking less like a cream.
Tips
You’ve done it, and you’ve reached the end. You now know how to cream butter and sugar by hand. Your dish would surely be the life of that table, and we believe that your family will love it. There are just a couple of things to add that will surely make your dish taste much better.
Make Sure to Mix Every Single Part of That Bowl
It’s an easy mistake to make. When people cream butter and sugar by hand, they tend to miss the bottom of the bowl and sometimes even the sides. That’s the last thing that you’d want to do here. Make sure to cover the entire bowl, and that every part of that mixture is less than perfect.
You Can Do Your Own Thing If You Want
Experimentation is always necessary. Once you start doing more and more dishes, you’ll begin to have your own opinion about how every recipe is done. You’ll develop your way. If you think a mixer can do a better job than your hand, get one, and if you think that frozen butter works better, then go for it.
Listen to Your Mom and Your Grandma

Every single piece of advice and nuggets of wisdom that you can get from them is precious and essential; take their opinion, because they have years of experience to back it up. Whatever they say can really make that dish better, so try it and decide if you want to keep doing it. Do you have any mom’s or grandma’s tips that you follow throughout the life?
If you think that this method isn’t for you and that you need a mixer in your life, check out our review of the best hand mixer on the market. See if any of those fit your needs. Also, check out our website — for more great cooking tips.


COMMENTS
17 July, 2020
I have a wooden spoon of my mum in my kitchen, but I always use a mixer while cooking. Unfortunately, it got broken right in the process, so I had to get that spoon. So now, I’m following your instructions. Thanks a lot. By the way, can I use a fork for stirring?
12 July, 2020
everything was very well explained, it helped me!
28 June, 2020
nice explanation and it is really helpful! Although I searched how to cream butter and sugar by hand, while reading I figured out some interesting details. I didn’t always manage to make such wonderful cream. Now I see what my problem was. butter wasn’t at room temperature. Always pay attention to the cooking process and the requirements!
21 June, 2020
I follow your site anytime I have questions on how to… Your cooking tips are so helpful. Thank you for specifying the room temperature value! I can make cookies and pies now)) Can you advise me how not to over mix butter and sugar? Is there a certain time of creaming?
29 May, 2020
Hi, that is the technique my mom taught me in my childhood!! I remember how I stood in the kitchen and helped her with cooking. I liked the process of blending and I always tasted it. But only now I understand that with the help of your own hands you feel the whole process and put your soul into cooking)
14 May, 2020
Hi! Oh, my god! I didn’t even know about the types of butter! Actually, I have never paid attention to this. That’s why my cream was not always sweet enough for me. An interesting catch! Hope, my next try will be more successful. Thanks for sharing the post. But using a blender is much easier than creaming butter and sugar by hand!